Best Practices for Storing Used Cooking Oil Safely
Introduction:
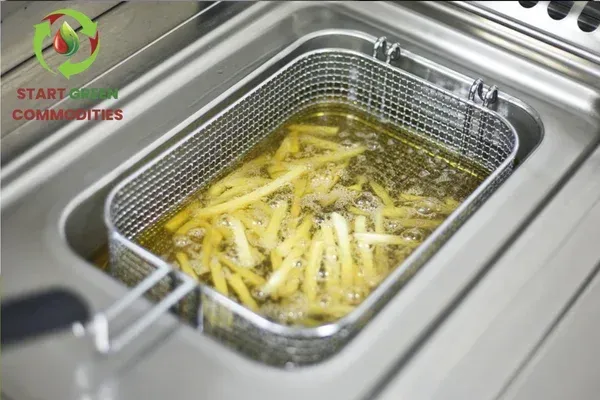
If you run a restaurant, food truck, hotel kitchen, or any commercial food operation, you already know that cooking oil is one of your kitchen's hardest-working ingredients. It fries your chicken, crisps your fries, and helps you crank out hundreds of orders a night. But once that oil has done its job, it becomes something else entirely: a liability if it's not handled correctly.
Improper storage of used cooking oil isn't just messy it's a fire hazard, a plumbing nightmare, a compliance risk, and a missed opportunity to make your kitchen more sustainable. The good news? Safe storage isn't complicated once you understand the fundamentals. In this guide, we'll walk through everything you need to know about storing used cooking oil safely, choosing the right used cooking oil storage containers, managing fryer oil day-to-day, and setting your business up for smooth used cooking oil recycling.
Whether you're a kitchen manager trying to tighten up your back-of-house procedures or a business owner looking to reduce liability and boost sustainability, this guide has you covered.
Why Safe Used Cooking Oil Storage Matters More Than You Think
It's easy to treat used cooking oil as an afterthought something to deal with at the end of a long shift. But the way you store spent oil has real consequences for your business, your staff, and your community.
Fire and Safety Risks
Hot oil is dangerous on its own, but oil that's stored improperly too close to heat sources, in damaged containers, or in overcrowded storage areas significantly raises the risk of kitchen fires. Grease fires spread fast and are notoriously difficult to extinguish with water, which is exactly why fire marshals pay close attention to how commercial kitchens store their oil.
Plumbing and Drain Damage
One of the most common (and expensive) mistakes kitchens make is pouring used oil down the drain "just this once." Oil solidifies as it cools, clinging to pipe walls and combining with other kitchen waste to form stubborn clogs. Over time, this leads to backed-up drains, foul odors, and costly plumbing repairs not to mention potential fines from your local sewer authority if grease from your establishment contributes to a sewer overflow.
Regulatory Compliance
Most cities and counties have specific regulations around commercial fryer oil management, including how oil must be stored, how often it must be collected, and how it should be disposed of or recycled. Falling out of compliance can mean fines, failed inspections, or even a temporary shutdown none of which are good for business.
Pest Control
Open or leaking oil containers attract rodents, flies, and other pests. Nothing tanks a health inspection score faster than evidence of a pest problem, and improperly stored oil is often the root cause.
Sustainability and Brand Reputation
Customers increasingly care about where their food comes from and how responsibly a business operates. Businesses that prioritize proper waste oil handling and used cooking oil recycling send a clear signal: this is a kitchen that takes sustainability seriously.
Understanding Used Cooking Oil Storage Containers
The foundation of safe oil storage starts with the container itself. Not all containers are created equal, and using the wrong one can undo all your other good habits.
What to Look For in a Storage Container
Leak-proof and sealed design. Your container should have a secure, tight-fitting lid to prevent spills, leaks, and evaporation of odors that attract pests.
Heat-resistant material. Oil should be allowed to cool before it's transferred into a storage container, but the container itself should still be able to withstand warm oil without warping, melting, or degrading.
Appropriate size for your volume. A container that's too small means frequent overflows and rushed handling. Too large, and the oil may sit for extended periods, increasing odor and fire-hazard concerns. Match your container size to your kitchen's actual oil output.
Clear labeling. Every container should be clearly marked as "Used Cooking Oil" so staff, inspectors, and collection crews immediately understand what's inside and how to handle it.
Sturdy, stable base. A container that tips easily is a spill waiting to happen. Look for wide, flat bases, especially if the container will be stored on uneven or sloped flooring.
Common Container Types
Grease barrels or drums Ideal for high-volume kitchens that generate large amounts of used oil daily. These are often provided directly by recycling companies.
Sealed plastic totes A good mid-size option for smaller kitchens or food trucks with moderate oil output.
Dedicated indoor caddies Small, wheeled containers used to transport hot oil safely from the fryer to the main outdoor storage container.
If you're unsure what size or type of used cooking oil storage containers your kitchen needs, a professional collection service can usually recommend the right setup based on your fryer volume and collection frequency often at no extra cost.
Step-by-Step: How to Store Used Cooking Oil Safely
1. Let It Cool Before Handling
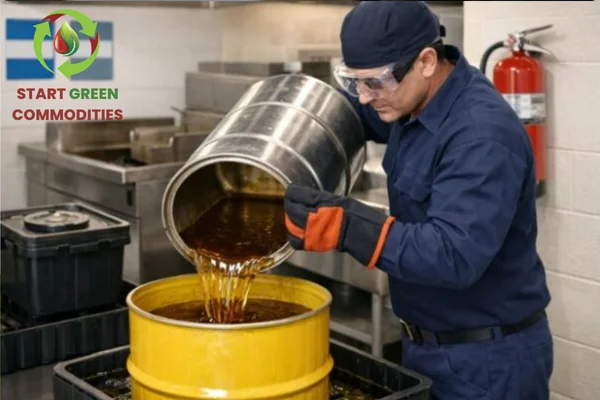
Never transfer hot oil directly into a storage container. Give the oil time to cool to a safe handling temperature first. This protects both your staff from burns and your storage containers from heat damage.
2. Filter Out Food Debris
Straining used oil through a fine mesh filter before storage removes food particles that would otherwise accelerate spoilage, create odors, and attract pests. Many kitchens keep a dedicated filtering station near the fryer for this exact purpose.
3. Use a Funnel for Clean Transfers
Spills during transfer are one of the most common causes of slip-and-fall accidents in commercial kitchens. A wide-mouth funnel keeps oil contained and reduces mess during the move from fryer to storage container.
4. Store Containers in a Designated Outdoor Area
Used cooking oil should be stored away from the main cooking area, ideally outdoors in a designated, covered space near your grease trap or loading dock. This reduces indoor fire risk and keeps odors away from food prep and dining areas.
5. Keep the Area Clean and Dry
Wipe down the storage area regularly to remove residue, and make sure the ground beneath your containers is protected a spill containment mat or tray adds an extra layer of protection against ground contamination.
6. Secure the Lid Every Single Time
This sounds obvious, but it's the most commonly skipped step during a busy shift. An unsealed lid invites pests, spills, and rainwater contamination (which can make recycling more difficult).
7. Set a Consistent Collection Schedule
Don't wait until containers are overflowing. Partnering with a reliable used cooking oil recycling service means your oil gets picked up on a predictable schedule, so storage never becomes a bottleneck.
Fryer Oil Management: Best Practices for the Whole Lifecycle
Safe storage doesn't start and end with the container it's part of a broader fryer oil management strategy that touches every stage of the oil's life in your kitchen.
Monitor Oil Quality Daily
Degraded oil doesn't just taste worse it breaks down faster and can create more sediment and residue, which complicates both storage and eventual recycling. Train staff to check oil color, smell, and clarity daily, and filter or change it based on usage volume rather than guesswork.
Train Your Team
Even the best storage system fails if staff aren't trained on it. Make sure every kitchen employee not just the head chef knows:
Where the storage containers are located
How to safely transfer oil from fryer to container
Why the lid must always be sealed
Who to contact if a container is full or damaged
A quick training session during onboarding, plus periodic refreshers, goes a long way toward preventing costly mistakes.
Track Volume and Collection Frequency
Keeping a simple log of how much oil your kitchen generates and how often it's collected helps you spot patterns like whether you need a larger container, more frequent pickups, or adjustments to your fryer usage schedule.
Never Mix Oil Types Without Checking First
Some recycling programs prefer oils to be kept separate by type (vegetable oil vs. animal-fat-based oils, for example). Ask your collection partner whether this matters for their process it can affect how efficiently your oil is converted into things like biodiesel.
Common Mistakes Kitchens Make with Used Cooking Oil
Even experienced kitchen teams fall into these traps. Watch out for:
Pouring oil down the drain. It seems harmless in small amounts, but it accumulates in pipes over time and is one of the leading causes of restaurant plumbing emergencies.
Overfilling containers. This leads to spills, especially when containers are moved for pickup.
Storing near heat sources. Grease bins placed too close to dumpster fires, HVAC exhaust, or direct sunlight degrade faster and pose added fire risk.
Using damaged or unsealed containers. Cracks and gaps are an open invitation for leaks and pests.
Ignoring odor buildup. A strong grease odor around your storage area is usually a sign that something needs attention whether that's a cleaning, a container swap, or a faster collection schedule.
Skipping regular pickups. Letting oil sit for too long increases the risk of overflow, spoilage, and non-compliance with local waste regulations.
Avoiding these pitfalls is often as simple as building a consistent routine and partnering with a recycling company that keeps you on schedule.
The Bigger Picture: Why Recycling Used Cooking Oil Matters
Proper storage is really just the first half of the equation what happens to that oil afterward is where the real impact happens. Used cooking oil recycling keeps spent oil out of landfills and sewers and transforms it into valuable resources like biodiesel, animal feed additives, and other renewable products.
For your business, this means:
Reduced environmental footprint Recycled oil doesn't end up polluting waterways or clogging municipal sewer systems.
Regulatory peace of mind Working with a licensed collector ensures your disposal practices meet local and state requirements.
Potential cost savings Depending on your volume, some recycling partnerships can offset costs compared to traditional waste hauling.
A stronger sustainability story Customers, investors, and local communities notice when businesses take environmental responsibility seriously.
If you want a deeper dive into how the recycling process works from collection to conversion, our detailed breakdown on used cooking oil recycling walks through the entire journey your oil takes after pickup.
And if storage is only one piece of the puzzle you're trying to solve, our guide to used oil management covers the broader picture from collection logistics to compliance so you can build a complete, worry-free system for your kitchen.
It's also worth noting that safe storage practices aren't unique to the restaurant industry alone. Even large-scale industrial and automotive operations that handle oil and lubricants, like Kernuco, rely on similarly disciplined storage and handling standards proper containment, clear labeling, and scheduled removal because the underlying safety principles are the same no matter the industry. Good oil management is good oil management, whether it's coming out of a deep fryer or an industrial process.
How to Choose the Right Used Cooking Oil Recycling Partner
Not all recycling services are created equal. When evaluating a partner for your fryer oil management needs, consider:
Reliability of pickup schedule. Missed pickups mean overflowing containers and potential compliance issues. Look for a provider with a proven track record of on-time service.
Container support. A good partner will supply or recommend the right used cooking oil storage containers for your kitchen's specific volume, often at no additional charge.
Licensing and compliance knowledge. Your recycling partner should be familiar with local and state regulations so you don't have to become an expert yourself.
Transparent process. Ask what happens to your oil after it's collected. A trustworthy partner will be upfront about how the oil is processed and what it's converted into.
Local presence. A provider familiar with your region's specific regulations and collection logistics will typically offer more consistent, responsive service than a large, impersonal national chain.
Building a Simple Storage Checklist for Your Kitchen
To make all of this actionable, here's a simple checklist you can post in your back-of-house area:
Oil cooled before transfer
Filtered through mesh to remove debris
Transferred using a funnel to avoid spills
Container lid sealed tightly
Container stored in designated outdoor area, away from heat
Storage area kept clean, dry, and pest-free
Collection scheduled and tracked
Staff trained on proper handling procedures
Print it, laminate it, and stick it near your storage area as a quick daily reference for your team.
Seasonal Considerations for Used Cooking Oil Storage
Storage needs don't stay the same all year round, and kitchens that adjust their routines seasonally tend to run into far fewer problems.
Summer Heat
Warmer temperatures speed up oil degradation and intensify odors, which makes your storage area more attractive to flies and other pests. During summer months, consider shortening the interval between pickups and double-checking that your storage containers are positioned away from direct sunlight and any exhaust vents that add extra heat.
Winter Cold
Cold weather can cause used oil to thicken or partially solidify, which makes it harder to pour and transfer cleanly. If your storage area is exposed to freezing temperatures, keep a close eye on containers to make sure lids and seals aren't cracking under the cold, and be extra cautious about slower transfers that increase spill risk.
Rainy Seasons
If your used cooking oil storage containers are kept outdoors, make sure lids are fully sealed to prevent rainwater from getting in. Water contamination can affect the quality of the oil and make it more difficult or less valuable to recycle. A covered storage area or simple overhead shelter can go a long way toward protecting your containers year-round.
Training New Staff on Oil Handling Procedures
High turnover is a reality in the food service industry, which means your oil handling procedures are only as strong as your most recent hire's understanding of them. Building a repeatable, simple training process helps protect your kitchen even as your team changes.
Consider creating a short, visual one-page guide that covers the basics: where the storage containers are, how to safely transfer cooled oil, why the lid must always be sealed, and who to notify if something looks off. Pair this with a quick hands-on walkthrough during onboarding rather than relying on verbal instructions alone new employees retain physical, demonstrated procedures far better than a rushed explanation during a busy shift.
It also helps to designate a point person often a shift lead or kitchen manager who is responsible for checking storage containers at the end of each day. This kind of accountability prevents small issues, like a loose lid or a nearly full container, from turning into bigger problems down the line.
Frequently Asked Questions About Used Cooking Oil Storage
How long can used cooking oil be stored before it needs to be collected? This depends on your kitchen's volume and local regulations, but as a general rule, oil shouldn't sit for more than a couple of weeks in warm weather. Partnering with a recycling service on a consistent schedule takes the guesswork out of timing.
Can I store used cooking oil indoors? It's best to move used oil to an outdoor, designated storage area as soon as it's cooled and filtered. Indoor storage increases fire risk and can create lingering odors in food prep areas.
What size storage container does my kitchen need? This depends on your daily or weekly oil output. A high-volume fryer operation typically needs a larger drum or barrel, while a smaller kitchen or food truck may only need a mid-size sealed tote. A recycling partner can usually help you determine the right fit.
Is it okay to mix used cooking oil with other types of grease or kitchen waste? Generally, used cooking oil should be kept separate from other grease trap waste or kitchen debris. Mixing materials can complicate the recycling process and may violate local disposal regulations, so it's best to check with your collection provider.
What should I do if a storage container starts leaking or smells strongly? Address it immediately transfer the oil to a backup container if possible, and contact your recycling provider to schedule an early pickup. A leaking or foul-smelling container is often a sign that a pickup is overdue or that the container itself needs to be replaced.
Final Thoughts
Storing used cooking oil safely isn't just about avoiding a mess it's about protecting your staff, your plumbing, your compliance standing, and your brand's reputation, all while contributing to a more sustainable food service industry. With the right used cooking oil storage containers, a consistent fryer oil management routine, and a dependable recycling partner, your kitchen can turn a daily waste challenge into a smooth, low-stress process.
If your business is ready to simplify used cooking oil recycling and build a storage system that actually works for your kitchen, Start Green Commodities is here to help. From container setup to scheduled pickups across Ventura and Los Angeles County, we make safe, compliant, and sustainable oil management simple so you can focus on what you do best: running a great kitchen.